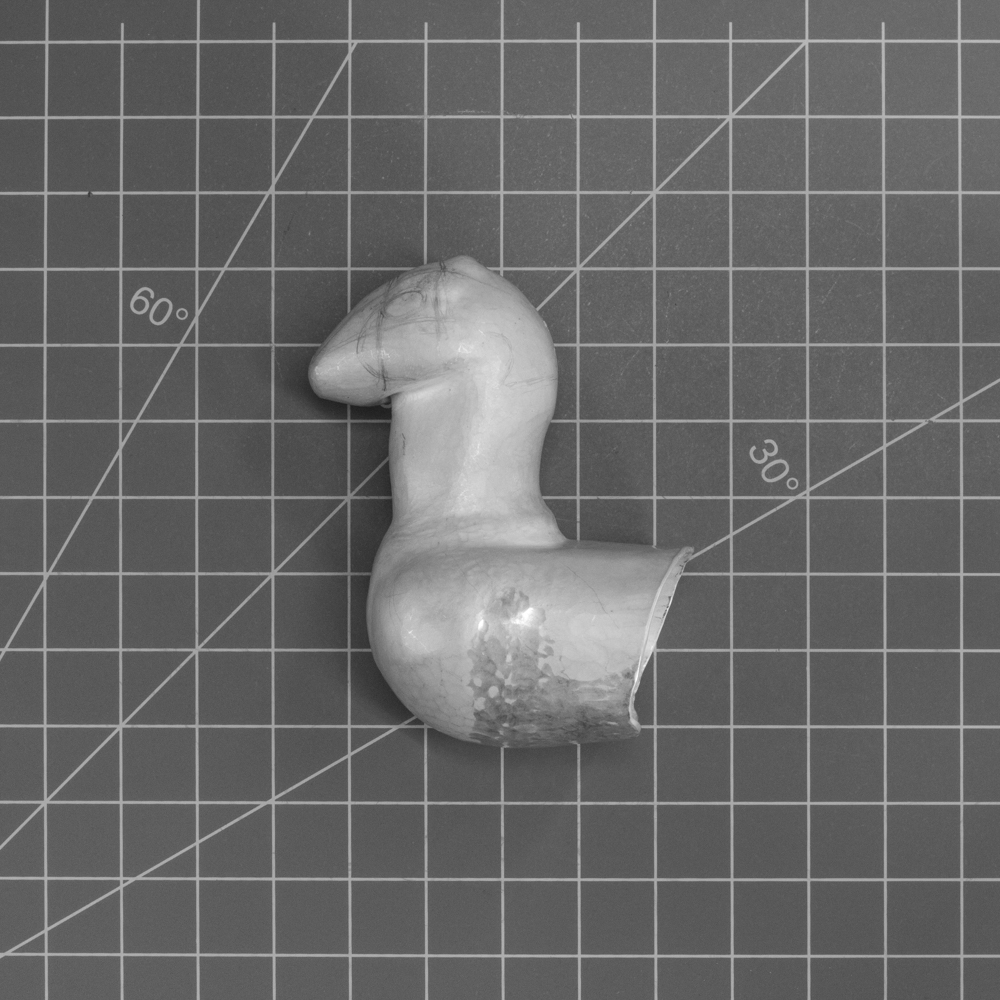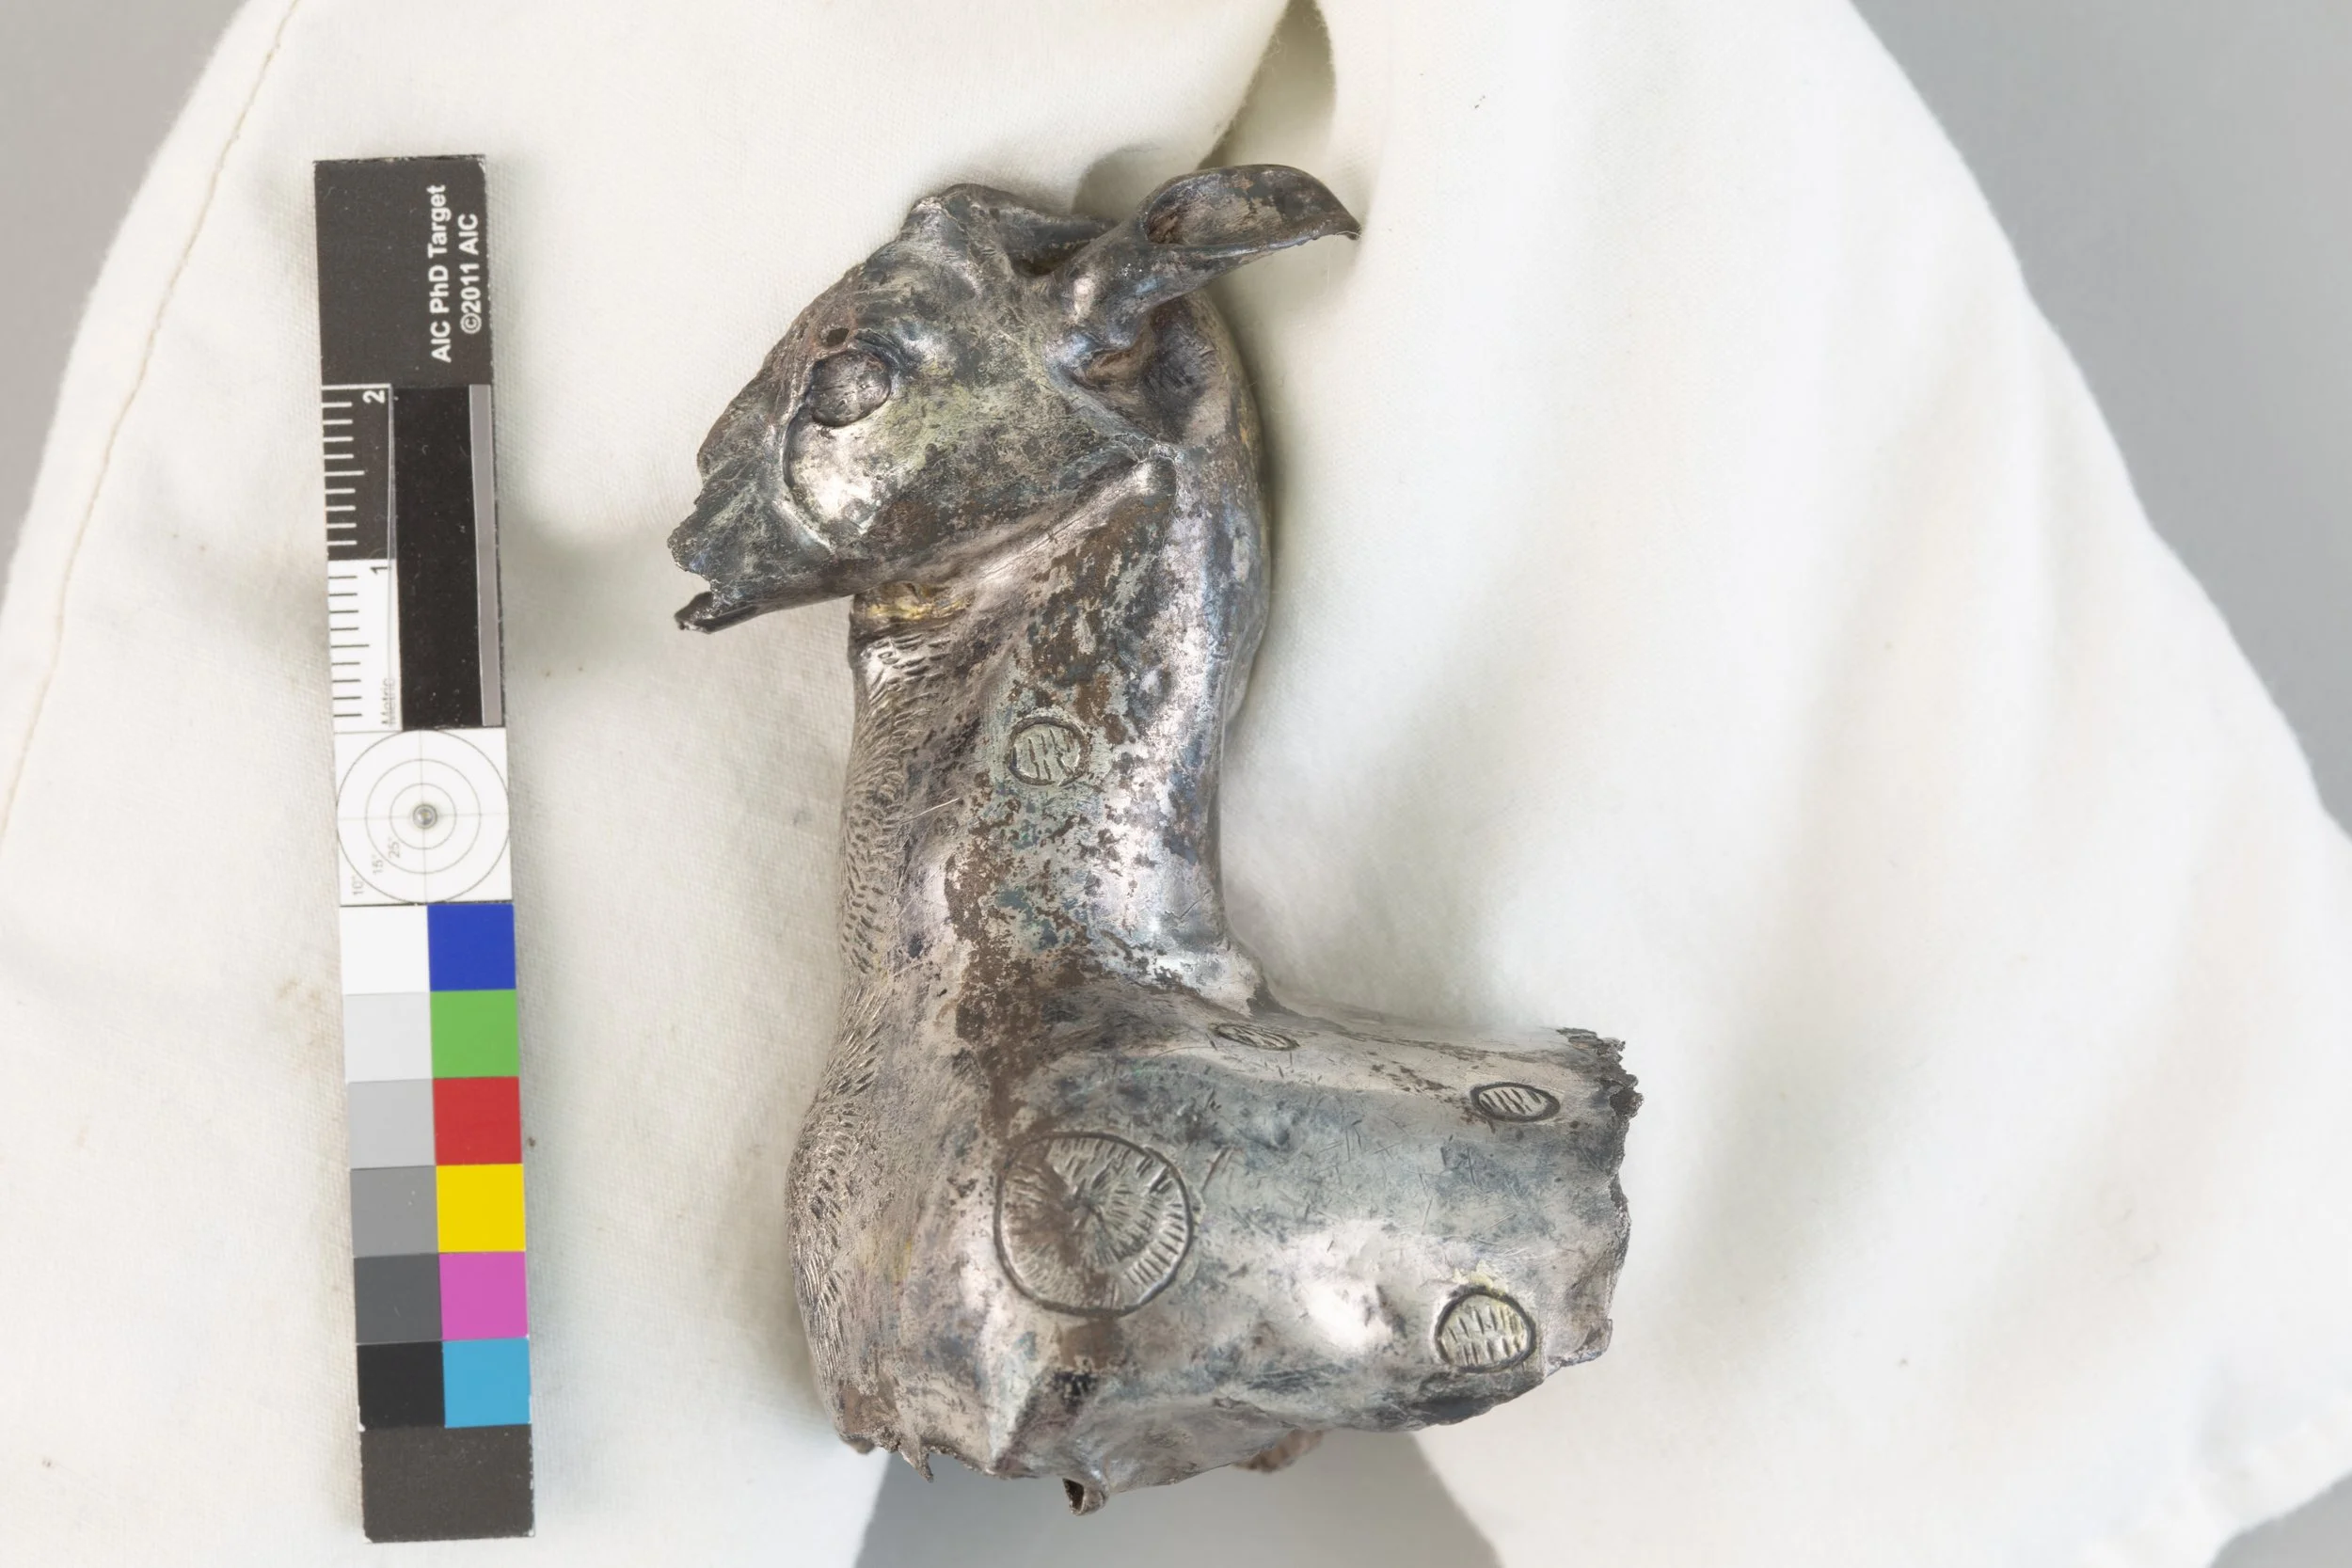
Fragment of a Rhyton
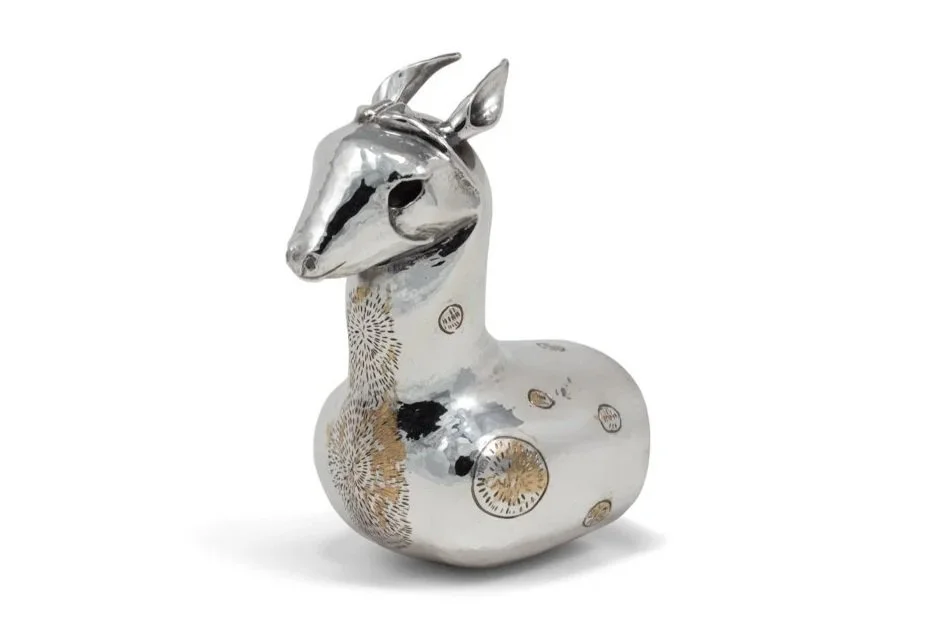
The project started with Susanne Ebbinghaus, the George M.A. Hanfmann Curator of Ancient Art and Head of the Division of Asian and Mediterranean Art at the Harvard Art Museums, reaching out to me in regards to a possible silversmithing workshop for a hands on appreciation to compliment the special exhibit she was curating, Animal-Shaped Vessels from the Ancient World: Feasting with Gods, Heroes, and Kings. In conjunction with the exhibition, the work shop would be part of a Symposium, Between Art and Asset: Silver Vessels from Antiquity to Today, and we thought it would be interesting to have a co-presentation between a silversmith and Angela Chang, Assistant Director, Conservator of Objects and Sculpture and Head of Objects Lab.On my first visit to Harvard Art Museums Angela had pulled this Fragment of a Rhyton from the collection for us to look over and inspect. By the end of the day I had decided that I would remake the Deer, documenting my process to share in our presentation, Reconstructing an Ancient Artifact: A Silversmith and a Conservator in Conversation. 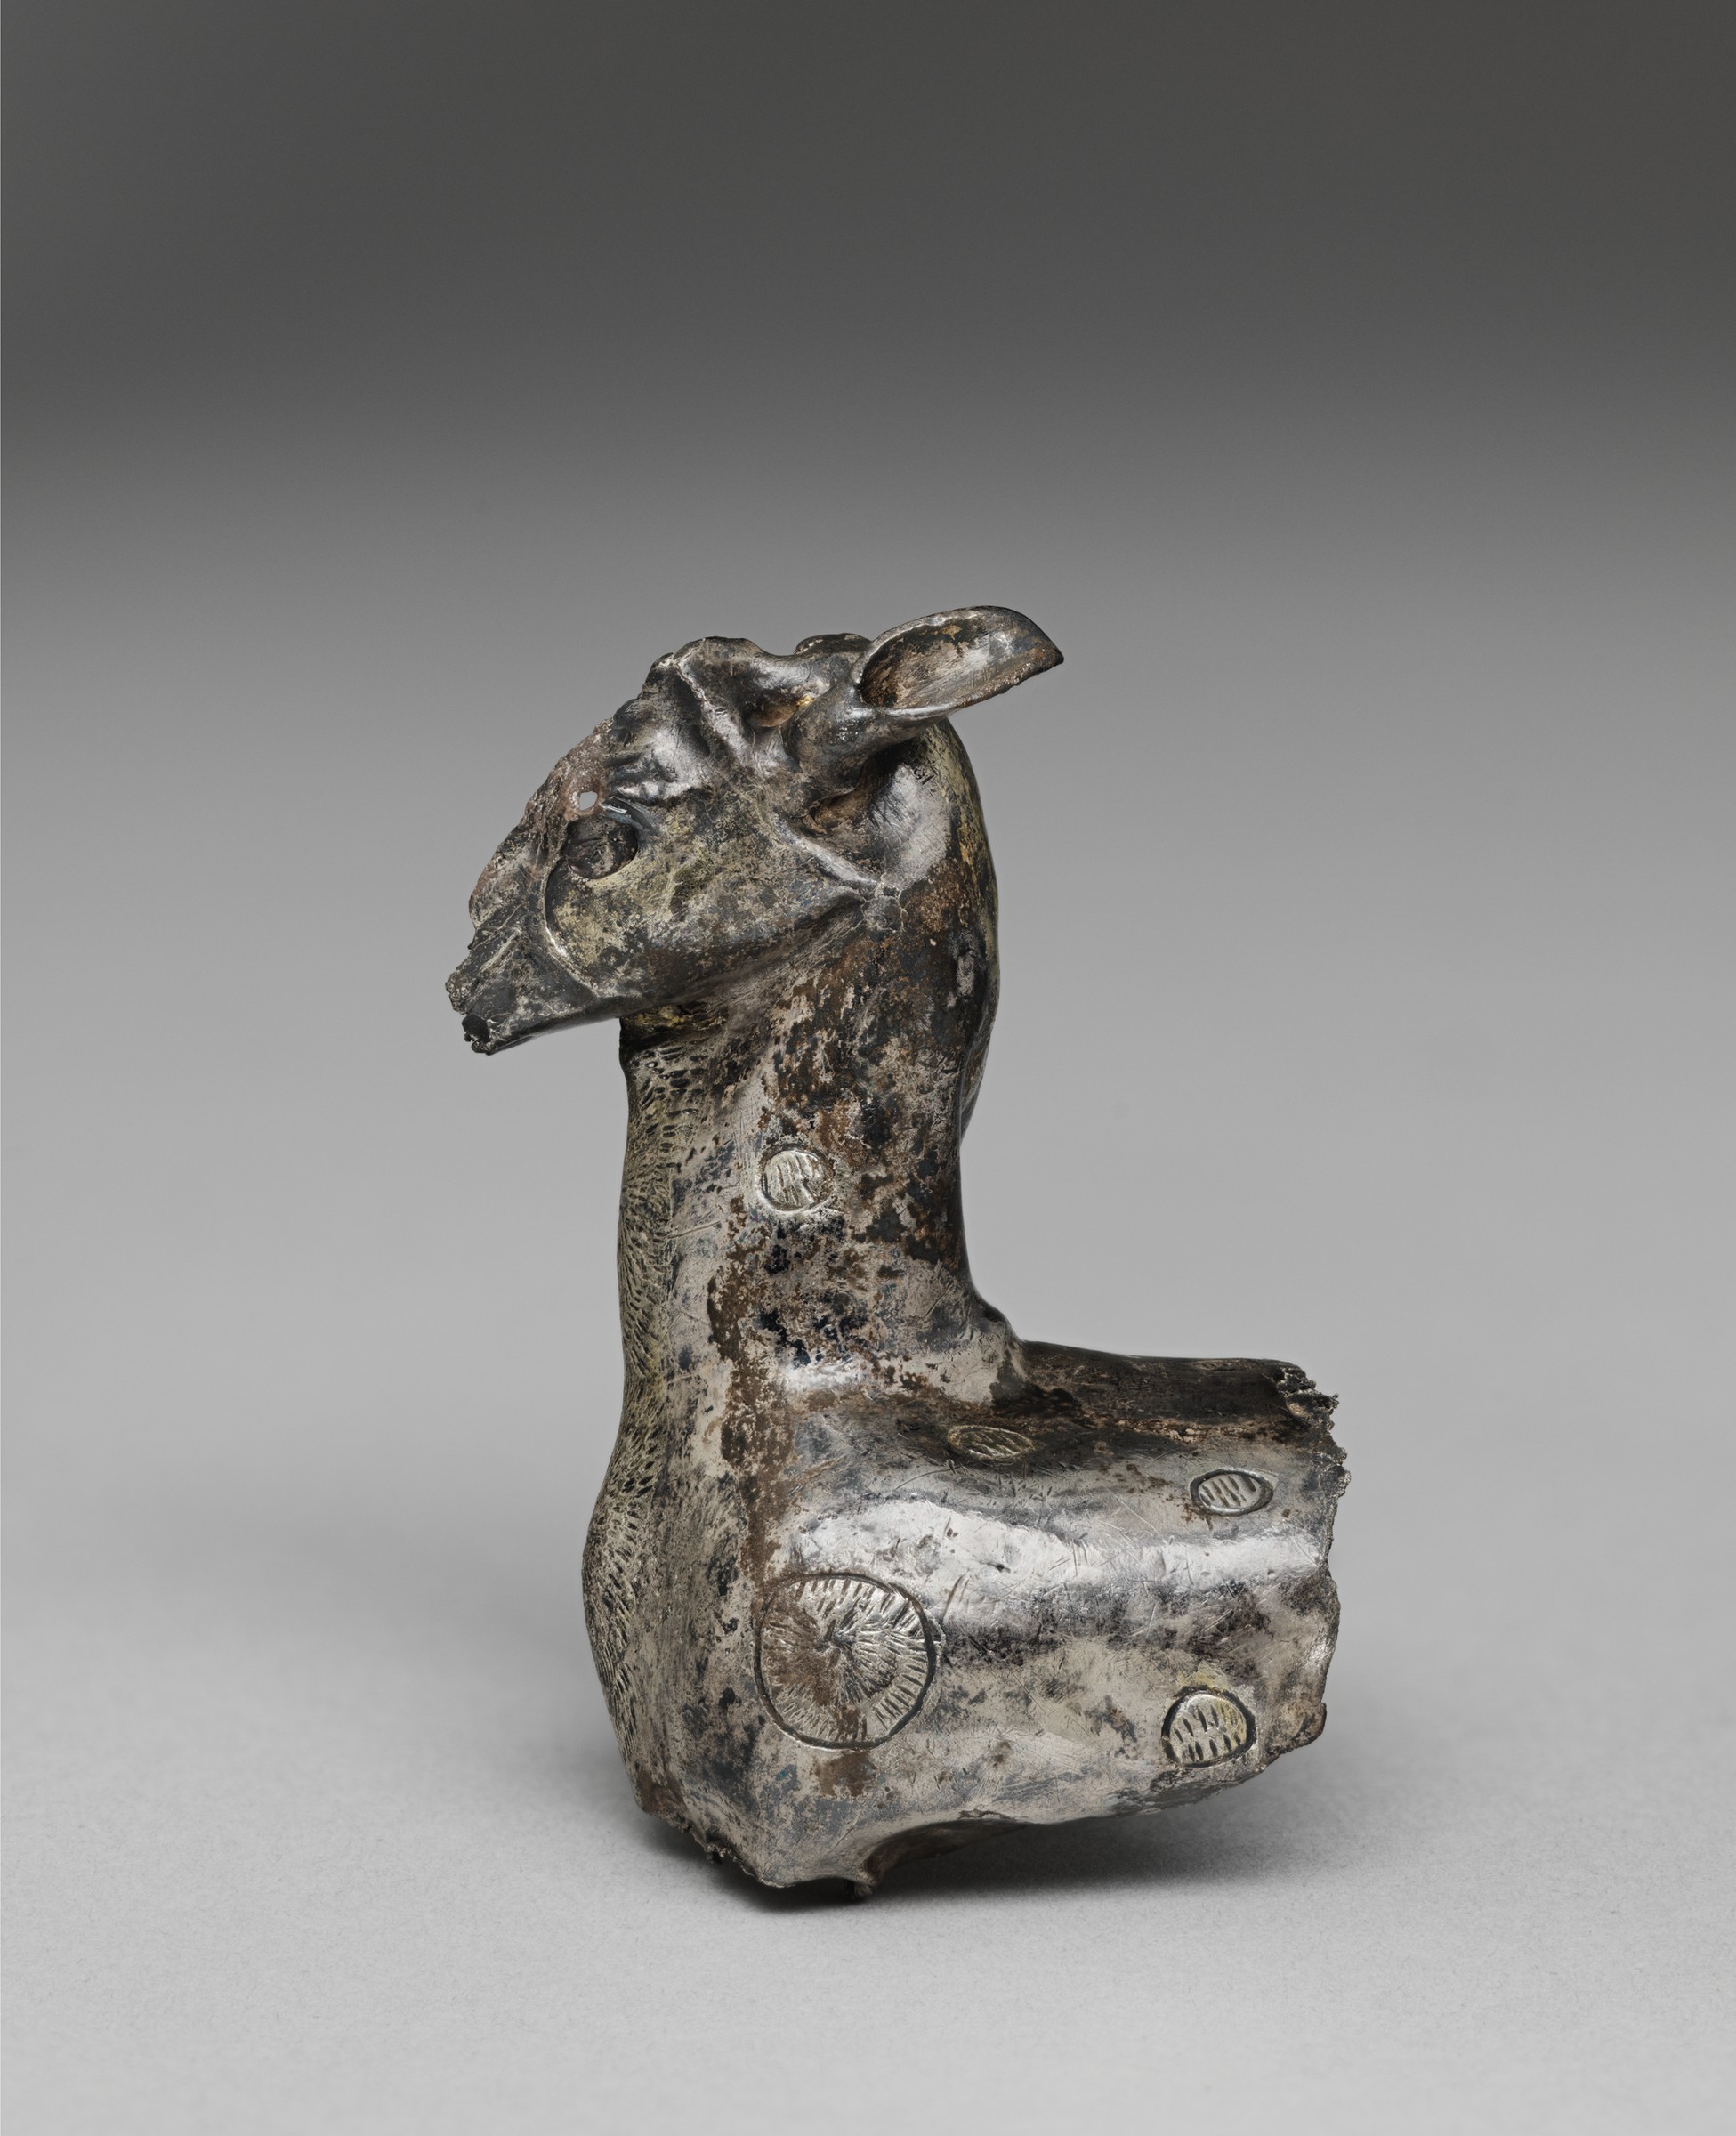
Harvard Art Museums/Arthur M. Sackler Museum, Alpheus Hyatt Purchasing Fund
Fragment of a Rhyton (a doe) Object Number - 1953.102
Achaemenid period, 5th century BCE
Silver, 8.1 × 4.1 × 4.9 cm (3 3/16 × 1 5/8 × 1 15/16 in.) 41.6 grams
Reconstructing the Deer
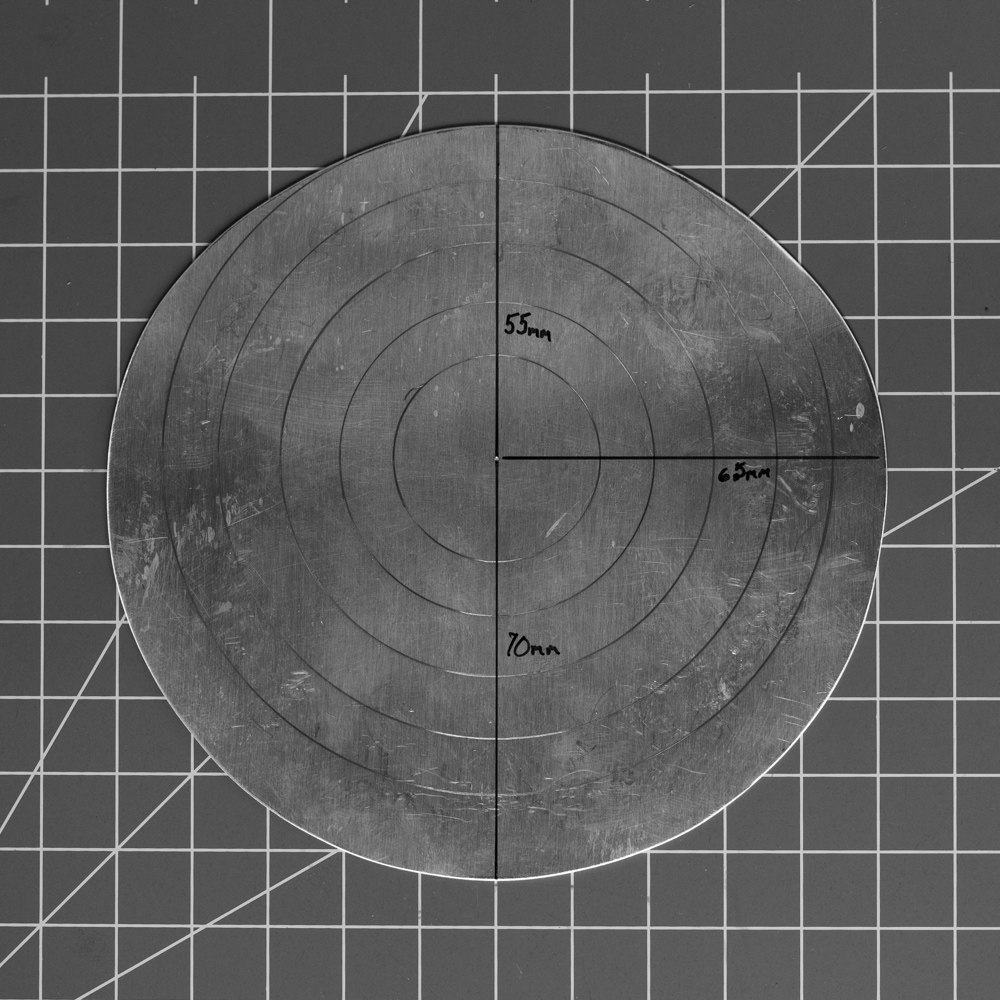
From images and measurements provided by Harvard Art Museum, I began to reconstruct the deer by forming the body through raising and attaching lost wax cast ears through soldering.
Part 1 - Raise create “cup form” out of fine silver sheet
A course is the time frame in which the metal transitions from a softened annealed state to work hardened. At the end of each course, the work was photographed to illustrate the progression of the piece. The initial cup forming took 11 courses. Special attention is placed on maintaining material thickness and insuring mass is allocated correctly.


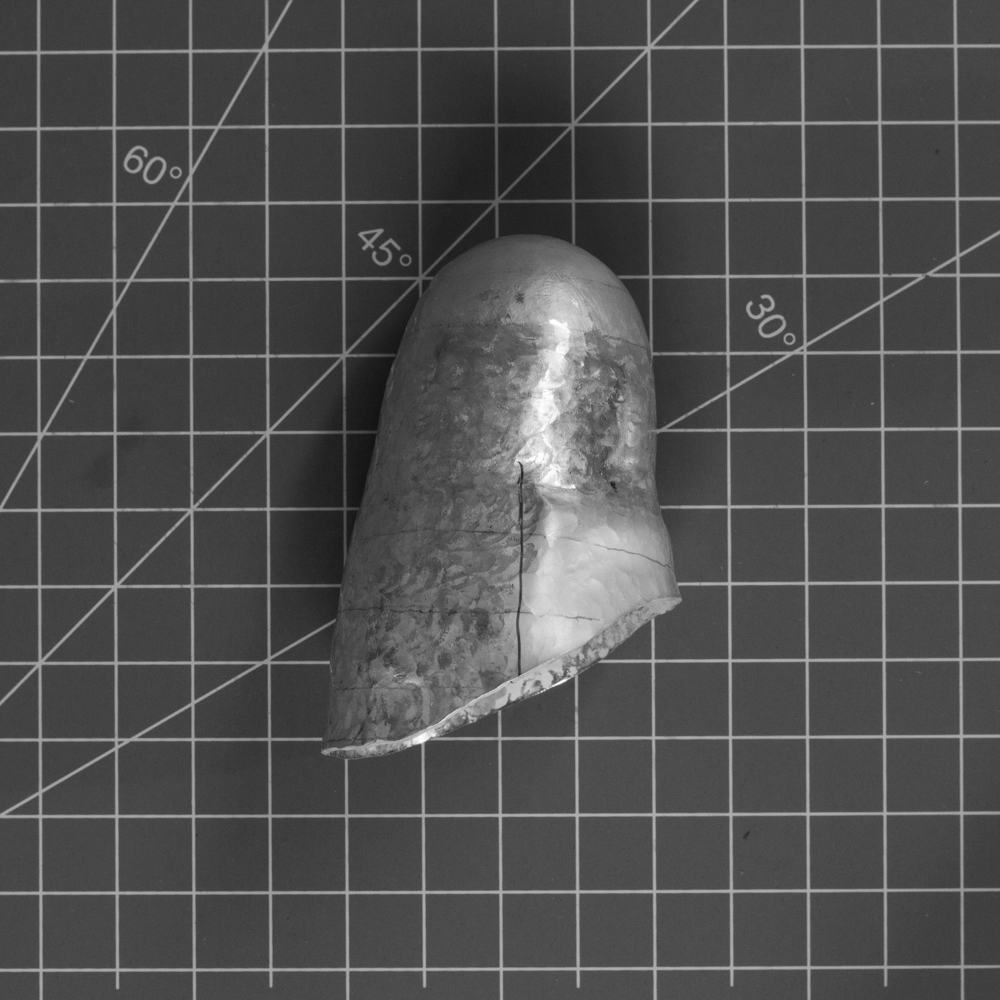
Part 2 -Isolate mass separate head, neck, and body
Forming the deer’s general shape took 20 courses.
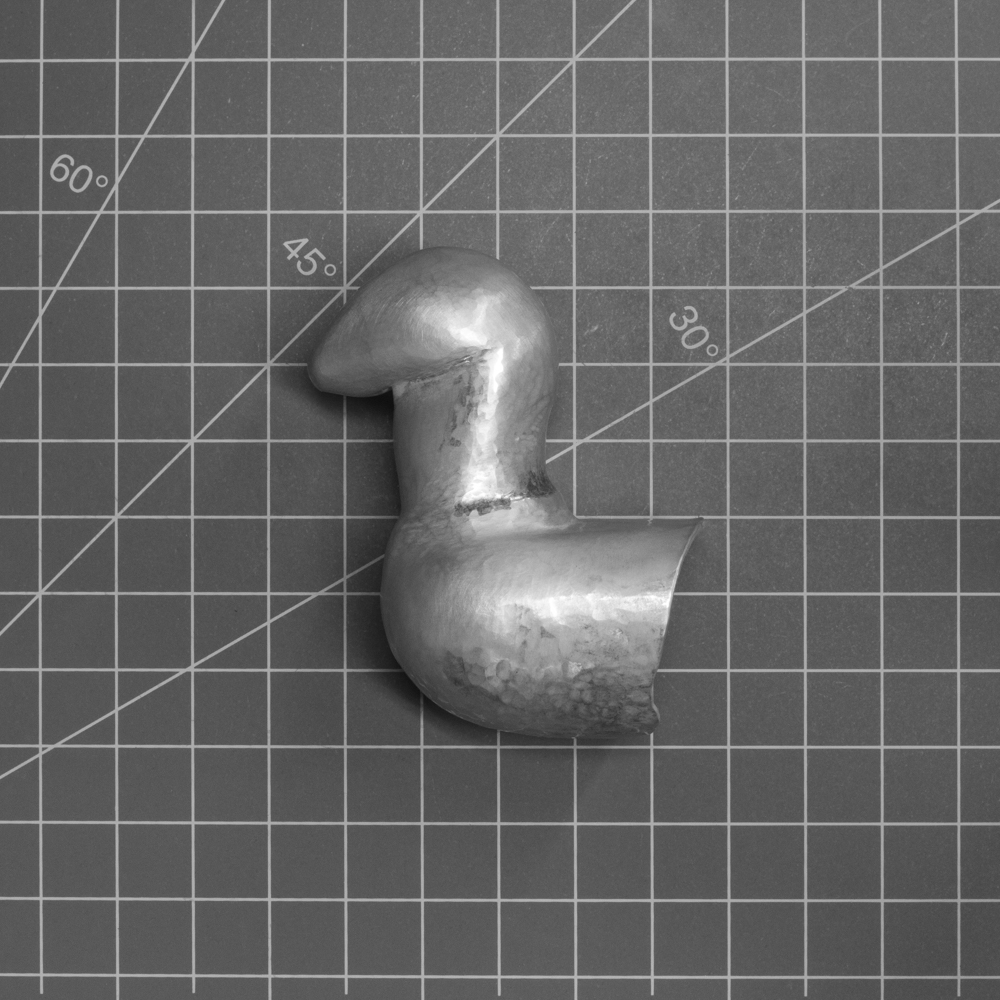
Part 3 - Refine & detail
chase & repoussé, attach cast ears, & gold leafing
Refining the form and detailing took 13 courses.